Catching Up….

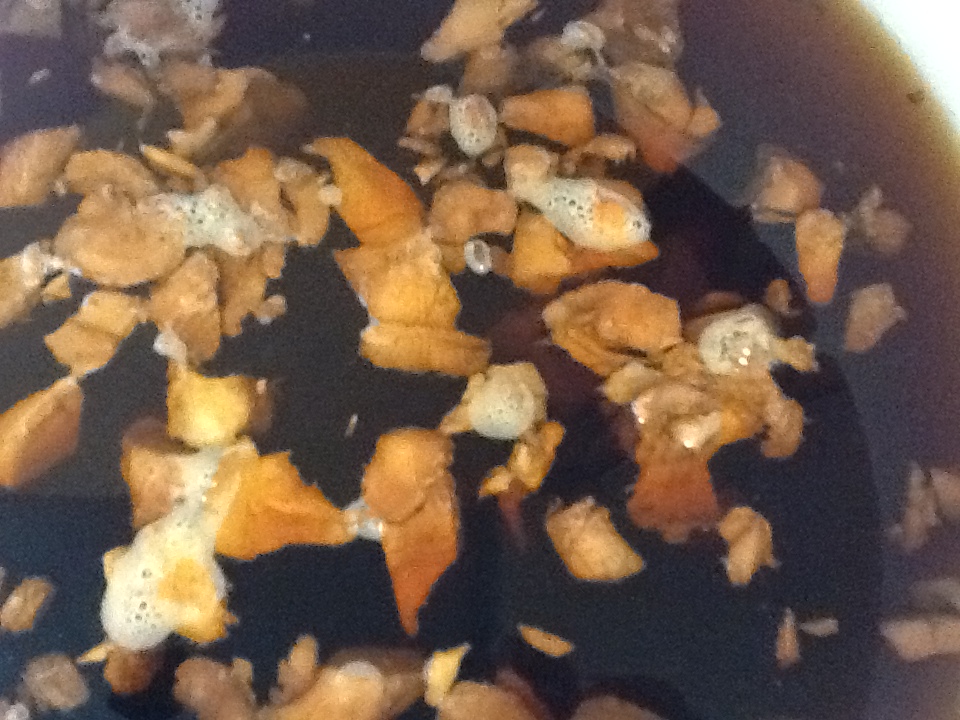
Well, with the year end madness over and the new year’s madness not quite in full gear yet, it seems like a good time to share what I’ve been up to in the homebrewing world…. The American mild project is dead in the water at the moment. But that doesn’t mean it’s dead. The three test batches I’ve brewed so far haven’t been stellar, but none of the totally sucked and they’ve given me some signs of where to take things. I’m looking forward to doing more experimenting with the recipe, but for now it will take a back seat to a couple other experiments. Not to mention brewing some beer I know and love in order to keep the beer fridge full! Yesterday, the matsutake mushrooms went into the BGSA I brewed a few weeks back. Usually when I do an experimental beer like this I have at least some idea of what the finished product will be like. This one is likely to be a total surprise. The one light in the darkness is that when I added the mushrooms, the aromas of the beer and the mushrooms seemed complementary. Let’s hope the flavors are, too! If you look closely at the pic below, you can see some of the shrooms floating in the beer.

My friend Mitch Scheele, who writes the homebrewing column for the Northwest Brewing News, contacted me about doing an evaluation of the effects of different sugars on beer flavor. Next Tues., we’ll be brewing up 10 gal. of a pretty standard wort (pale malt with a touch of C60). At the end of the boil, we’ll split it into 4 different fermenters and add different sugars to each. We’ll be using honey, molasses, D-45 (from candisyrup.com) and muscovado sugar. When fermentation is done, we’ll try to guess which is which in a blind tasting. But the main objective is simply to evaluate what each tastes like, not so much to decide which is “better”. In a couple months we’ll do another round with another batch of sugars. In the world of “normal” brewing, tomorrow I’ll be whipping up a batch of my Milo’s Alt recipe (named for a dear departed cat) and after that a batch of Dean Larson’s classic “Christmas Tree Ale” version of Sierra Nevada’s Celebration. So, let’s hear about what you’re brewing in the new year!

Thoughts on the American Mild project

When last we left our intrepid homebrew experimenter, he was struggling through forests of formulation in the quest for a new, low alcohol beer style known as the “American Mild”. His search seemed never ending and at times fruitless…but he forged on…. (read about the previous batches here: v1v2 and v3 )

OK, OK, enough of that…here’s where things stand on the American Mild project. I’ve brewed 3 batches of the mild so far. The goal is to come up with a low alcohol, flavorful beer with enough body to make it worth drinking. And I wanted to keep it “American”, using all domestic ingredients and a hop centered flavor profile.

The first batch, consisting of mainly domestic pale malt with a lb. each of crystal and Special Roast just had nothing there…my wife called it “water”. Ouch.

The second batch replaced a lb. of pale malt with a lb. of domestic Munich. Better, but still extremely light on body and flavor. On the other hand, the hopping was in the ballpark.

For the third test batch, I made some major changes. I used domestic Munich and pale malt in equal amounts and included a lb. each of C60 and carapils. I also decided to use a hop stand after the boil, steeping an ounce each of Amarillo and Simcoe at 170F for 20 min. well, the grist seems to have worked really well. Good flavor and increased body. The hop stand worked almost too well. I got huge hop flavor and aroma and an increased bitterness. They pretty much overwhelmed the beer to the point where you can hardly tell there’s malt there unless you search for it! I guess this is kind of a case of “be careful what you ask for”.

So, I’m thinking about test batch #4. I think I’ll use the grist from #3. The balance of pale and Munich seemed to work well. And if it doesn’t, next time all the pale will be replaced with Munich, although I’ll kepp the C60 and carapils. I still haven’t decided which way to go with the hops. I’ll either use the hop schedule from #2, or I’ll go totally off the wall and do all the hopping as a whirlpool addition, a la Pelican Kiwanda Cream ale. It will be a few weeks until I have a chance to brew another test batch, so I have some time to cogitate (perfect for a codger like me!).

Now, where did I leave that machete and elephant gun?

Mead – What Does That Have To Do With Homebrewing


TLDR – Read this about some meadmaking adventures I’ve had Anniversary Meads – A Tale of Honey and Fun! One of the things I have no clue how it happened – how did brewers decide to incorporate Mead in their bailiwick? Well, not legally of course. If you want to open a meadery in most states, you need a winery license. A brewery license won’t cut it. But, homebrewerly speaking, mead seems to be a well adopted brewer thing. Maybe it’s the fact that so much of early homebrewing was about adapting British techniques and styles that we just naturally scooped up British/Celtic mead traditions in the mix and went “eh, why not?” Or maybe it’s that once you’re used to heating up water and performing fermentation, mead seems too damn easy to ignore. Regardless, when I can get up the gumption (and money for the honey) to make some mead – I do and I never regret it. What does this have to do with Experimental Homebrewing? Two things!

  1. The use of staggered nutrient feeding vs. no nutrient vs. all the nutrient at once is a great experiment. These days the preponderance of results indicates that staggered feeding works like a charm to make great mead faster
  2. The wine world has a base practice of always tasting and adjusting even as you head into the package. I think brewers can learn an awful lot from that.

I just wrote this up for the Maltose Falcons’ 40th Anniversary Party where we took 78 pounds of honey and made 25 gallons of mead. Additionally, I made five additional flavor variants using some of the techniques we talk about in the book – so read on up!

American Mild v3

Well, after living with the first 2 versions of the American Mild for a few weeks now, I have some thoughts and ideas about the direction of this project….. I ended up dry hopping the second batch in order to try to give it more flavor. The taste of both batches is pretty good, but as I feared, they’re both pretty thin. My wife refers to them as “water beer” because of the mouthfeel and the fact that the flavor is pretty watered down. So I think that instead of the incremental changes I was gonna make, it’s time for a rethink and change of direction. I’ve considered the fact that maybe I need to bump the OG up to 1.045 so I can get more ingredients in there, but I’m going to try a different grist bill first. With that in mind, here’s where I think the next batch is heading…. 4 lb. Great Western Munich 10L 2 lb. Rahr pale malt 1 lb. C60 1 lb. carapils I may chicken out on that much carapils and dial it back to 1/2 lb., but the beer sorely needs something to give it some body and mouthfeel. In addition, I came to the conclusion that I really didn’t care for the Special Roast being the primary carrier of flavor. It seemed a bit harsh, so I decided to just remove it completely in this version. I’ll keep the BU:GU ratio about 1:1 or a bit less with most of the hop additions in the last 10 min. or so, and likely will dry hop it again. I’m really liking the no sparge technique for this, so I’ll keep that. I bumped the mash temp up to 165 for the last batch, so I don’t have a lot of room to play with there. An interesting discovery from doing that is that the change from a 153 mash temp to 165 really didn’t change the body or sweetness much, if any. It certainly didn’t change the fermentability. Both batches started and finished at the same gravity. That’s contrary to the conventional wisdom about mash temps, but in line with research presented by Greg Doss of Wyeast at the 2012 NHC in Seattle. So I think I’ll stick with the 165 mash temp, since I seldom mash that high and this is a good chance to collect some data about it. I had expected this project to be a challenge, and I’m certainly getting that. The flavor of the first two batches is actually pretty good…there just isn’t a lot of it there. I’m hoping I don’t hit a brick wall on this, but only more experiments will tell!

Brewing up a new style

Thought I’d start a thread to document my attempts at coming up with an “American Mild” ale. I want to end up with a sub 4% beer that doesn’t have flavor and mouthfeel comparable to water! I’m basing it on the English Mild, obviously, but with American ingredients. My goal is to come up with a beer with the body and flavor impact of a traditional mild, although not the same flavor.

I’m guessing this will take at least 3-6 attempts to get to what I have in mind. I’m hoping that the amount of crystal, the high mash temp, and the yeast will give me the body I want, while all the late hops will have a lot of flavor but bitterness in line with the OG. I’m also doing it no sparge, which I haven’t done in a while. I have several ideas as to where it might go from here, but I won’t speculate until it ferments out and I have a chance to evaluate it and think about the next steps. I wanted to start pretty basic rather than throw the kitchen sink at it on the beginning. It’s gonna be an evolutionary process. To me, this is what experimental homebrewing is all about. You have a vision and you experiment with what it’s gonna take to bring that vision to a glass in your hand!

Here’s the recipe….

#463 American Mild A ProMash Recipe Report

Recipe Specifics –

—————

Batch Size (Gal): 5.50 Wort Size (Gal): 5.50 Total Grain (Lbs): 8.00 Anticipated OG: 1.036 Plato: 8.91 Anticipated SRM: 10.3 Anticipated IBU: 31.3 Brewhouse Efficiency: 73 % Wort Boil Time: 60 Minutes

Pre-Boil Amounts

—————-

Evaporation Rate: 1.50 Gallons Per Hour Pre-Boil Wort Size: 7.00 Gal Pre-Boil Gravity: 1.028 SG 7.05 Plato

Grain/Extract/Sugar % Amount Name Origin Potential SRM –

—————————————————————————-

81.3 6.50 lbs. Pale Malt(2-row) America 1.036 2

12.5 1.00 lbs. Crystal 60L America 1.034 60

6.3 0.50 lbs. Special Roast Malt America 1.033 40

Potential represented as SG per pound per gallon.

Hops Amount Name Form Alpha IBU Boil Time

—————————————————————————–

0.50 oz. Chinook Pellet 12.10 15.5 20 min.

0.50 oz. Simcoe Pellet 15.40 11.8 10 min.

0.50 oz. Centennial Whole 10.20 3.9 5 min.

1.00 oz. Columbus Pellet 15.20 0.0 0 min.

Yeast

—–

Wyeast 1450 Denny’s Favorite

Mash Schedule

————-

Mash Name: Total Grain Lbs: 8.00 Total Water Qts: 16.00 – Before Additional Infusions Total Water Gal: 4.00 – Before Additional Infusions Tun Thermal Mass: 0.13 Grain Temp: 65.00 F

Step Rest Start Stop Heat Infuse Infuse Infuse Step Name Time Time Temp Temp Type Temp Amount Ratio

———————————————————————————

sacc 0 60 160 160 Infuse 173 16.00 2.00

Total Water Qts: 16.00 – After Additional Infusions Total Water Gal: 4.00 – After Additional Infusions Total Mash Volume Gal: 4.64 – After Additional Infusions All temperature measurements are degrees Fahrenheit. All infusion amounts are in Quarts. All infusion ratios are Quarts/Lbs.

Champagne Splits

The first article I ever wrote for Zymurgy was “Et Tu, Brut: Brewing the Champagne of Beers”. It was featured on the cover of the May/June 2006 issue (AHA Membership required to read). The whole article was about making Champagne style beers that were inspired by the appearance of beers like Mahleur Brut and Deus de Bosteels. Those are some great beers with prices to stop you in your tracks! Naturally, being homebrewers, Kent Fletcher and I figured that we should be able to do it ourselves! Here’s the basic write-up of the whole process – Methode Champenoise for Beer in the Brewing Techniques section of the Maltose Falcons website. I tend to think of it as very simple – you’re basically just storing the bottles and then cracking them open for 30 seconds!

Methode Champenoise 30 Second Summary

  1. Make the beer and ferment to dryness
  2. Bottle the beer in champagne bottles with a spicy sugar syrup (Champagne bottles with caps)
  3. Put the bottles in a case – cap side down and lay the box on it’s side. Wait a few weeks.
  4. After waiting, slowly tilt the box upright over a few weeks, give the bottles a twist everytime you move the box. The end state is bottles resting upside down on their caps in the box.
  5. Chill the bottles overnight in the fridge
  6. In the morning, mix acetone and dry ice in a metal pan. Narrow pans work best. Use a thermometer and watch the temperature drop to -20 to -40F
  7. Take a bottle and hold it, cap side down, for 30-60 seconds to freeze a plug of ice in the neck.
  8. Brace the bottle against your leg, point away from anything damagable and pop the cap
  9. When the ice and yeast plug fly – squirt in a little extra beer / liquor / spicy sugar solution and cork and cage. (We use the plastic hammer in corks)

So, now that the recap is done – what’s the deal with the brut today? Why talk about it now? Because on Monday, Fletch and I will be re-brewing the classic Brut du Faucon! But this time, we’re going to be going about it in my splitting ways so that we can produce multiple Bruts from a single 15 gallon batch. Here’s the base recipe:

Brut du Forty

For 16.5 gallons at 1.088, 21 IBUs, 5 SRM, 10% ABV (before bottling), 90 minute boil

Grain/Sugar

30 lbs Pilsner Malt

1 lbs Aromatic Malt

1 lbs Caramel Pils (8L)

4 lbs Sugar

Hops

1.25 oz Magnum 12%AA 60 minutes

Hops (5 gallon Final Chill)

1.00 oz Pacific Jade 9%AA 10 minute whirlpool stand

1.00 oz Citra 14.4%AA 10 minute whirlpool stand

Mash 148F for 60 minutes

Yeast

Wyeast 3787 and a few others TBD

And then the magic – not only will be doing multiple yeasts – but I feel like we’ll be pulling my classic trick of – Chill one part of the wort and stop! Toss in a bunch of hops and let them steep as a knockout addition. Then chill that part and boom – we have Brut Regular and Brut IPA! Updates later when we’re closer!

Return of the Wee Shroomy

Here in Oregon, we had the best year for mushrooms in the last 20 years. Yummy bits of fungal goodness were popping up all over in the woods behind my house. When my wife came back from a walk in the woods with a grocery bag full of chanterelle mushrooms, it was time to brew the Wee Shroomy! If you don’t know, that’s a Scotch ale/wee heavy that has 2 1/2 lb. of chanterelles added to it after primary fermentation.

The very idea makes some people gag (kinda like when I think of a PB&J beer!), but others like me can almost taste in our minds how the rich, earthy, apricoty chanterelles integrate with the delicious malt of a wee heavy. I got the idea from Randy Mosher’s book “The Brewers Companion”. He calls his version Nirvana…I mean, with a name like that, how could you NOT want to taste it?

For the wee heavy, I use an amazing recipe from Scott Braker-Abene.
You can find the entire recipe and procedure for my version at Archive.org Snapshot of AHA WIki .

Be sure to read all the notes and follow the instruction exactly. The boil down of the first runnings of the wort and the method for treating the mushrooms are really crucial to getting the best results. Believe me, I’ve tried it other ways, and I want to save you the trouble!

Be sure to ferment at no higher temperature than mid 50s. yeah, I know that WY1728 isn’t supposed to work that low, but it does great at that temp and it really benefits the beer. For those of you with a keen sense of the wild and absurd,

Here’s a picture of the secondary just before the beer was kegged. Most of the mushrooms are submerged, but there are some floating on the surface.

Don’t You Love It When a Plan Works?

In this blog post , I wrote about the changes I’d made to my Rye IPA brewing process that I felt had made a huge improvement in the beer. I brewed a second batch exactly like the first in order to confirm that those changes were actually the reason I liked the beer so much more than before. Well, I kegged that second batch yesterday. Not only is it totally delicious, it’s as close to the first batch as my “cheap’n’easy” process control can come. I’m really pleased with the “new” Rye IPA, and I’m at least as pleased that my experimental methods got me the results I was looking for. Next experiment…..tweaking my “Noti Brown” American brown ale recipe to round out the flavor while still keeping the bitterness that I love about that beer.

Am I Good or Just Lucky

I wrote a while ago about my experiments to increase sulfate levels in my Rye IPA. My latest batch, with a sulfate level of 300 ppm, is far and away the best of the many batches of this recipe that I’ve made over the years. So, now what I need to do is brew it again, exactly the same way, to find out if the changes in sulfate were the reason or if I just had Ninkasi looking over my shoulder when I made the last batch. That’s what I’m doing today…brewing exactly the same recipe, with exactly the same ingredients, down to the same bags of malt and hops. This is one of those things that can really increase your understanding of what impacts your beers, and it’s also one of those things that many brewers are loath to do. I know that when I started brewing I wanted to experiment with different styles, ingredients and techniques and it was really difficult to get myself to brew the same thing twice. Fortunately, pretty early on I hit on some recipes I loved, so it was easier to justify rebrewing them since I wanted to have that beer around. But I guarantee you that brewing the same recipe over and over can be far from boring. Instead, I like to think of it as a challenge to my process and skill to see how close I can get to the last time I brewed the recipe. And since you’ll likely be rebrewing a recipe you loved before, where’s the downside? You get more of a beer you already know you like!

Cascade Brewers Society Iron Brewer 2013

Our club had its annual Iron Brewer competition last Saturday. In case you’ve never seen Iron Chef, the TV show that inspired the event, teams of brewers arrive at the brewing location, set up their equipment and are given secret ingredients to use in a batch of beer which they have 5 hours to brew. The ingredients don’t have to dominate the beer, but they do have to make a noticeable contribution to the beer. We had six teams of 2 brewers this year. Each team was given a selection of crystal malts (20, 60, and Special B) and a quart of pomegranate juice to use. I always like to throw in a diabolical twist during the brewing process. In the past, it’s been as evil as confiscating each team’s specialty malts and redistributing them to other teams, but this year I wanted to take it easy on them. A couple hours into brewing, each team was given a bomber of St. Denny Dubbel, a gluten free beer from Harvester brewing in Portland OR (http://www.harvesterbrewing.com/our-beer) and told they had to drink it while brewing. Yeah, not too diabolical. There were some great great sounding beers brewed and I’m happy to report that everyone completed their brew in the required time. In early September we’ll have a club party and the beers will be judged by “celebrity” judges on the criteria of flavor, lack of flaws, and use of special ingredients.

More photos at http://s794.photobucket.com/user/dennyconn/library/IB%202013