TLDR – Lord You Talk Too Much Drew – Executive Summary
It looks like no, Steel cut oats don’t necessarily need to be pre-cooked to use in a mash, but judging by the results I saw – it still helps.
For Those Who Like To Read
I am a huge fan of oats in beer as listeners of the podcast will discover shortly. I tend to use them in a lot of places, because why not. It’s probably because I’m part Scottish or something. (honestly family lineages are so screwy who can tell)
Anywho.. digressions aside. The second episode of the Brew Files – The Crushable Cream Ale, led to me getting tagged on a Facebook homebrewing post about steel cut oats. (Homebrewers Roundtable is a closed group, so you’ll need to ask to be a member of the group.)
Namely, can they just be mashed like normal or should you cook them first? I got tagged because listener Paul Galardy suggested – “maybe they should be cereal mashed and you can hear Drew drone on about it here” (Paul was nicer than my editorializing!)
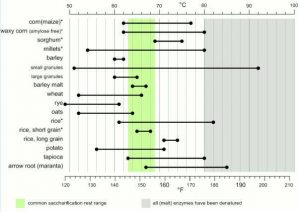
The question comes – well, the tables that are out there say oats gelatinize at temps lower than mash temps (~125-144F) Basically for oats, that’s the range in which the starches bust out of their cages and go racing free into the soaking liquid. Different cereal grains gelatinize at different temps. You can see from the photo I borrowed from Adam, oats, rye, wheat all happily gooify below saccharification temps. Corn and rice, on the other hand, do not. So that’s why when we talk about Cream Ale (or American Light Lager), you have to talk about pre-cooking the grain.
But not all grain types are equal. I would bet good money that the majority of people think of oats as looking like this.
Those are flaked oats and they’re versitile and wonderful to use. Big thing about flaked grains in general – they’re already gelatinized – hit them with hot water and the starches are free to disperse. That’s why so many brewers will use flaked corn or flaked rice. Less work!
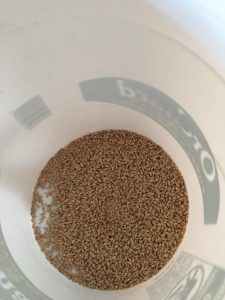
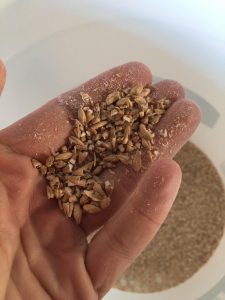
But steel cut oats are a little different, they’re little pieces, but they haven’t been pre-cooked and when made for breakfast, they take a good long while to cook. Is a regular mash hot enough and long enough to hydrate the cereal and get the starch into solution to be enzymatically transformed to sugary good times? See what they look like? (For more information about oat forms – check out this kitchn article)
Steel Cut Oats – Plus Look 20+ years later and sexy knife scar still on the pinky!
The “Experiment”To answer the question at hand, I set up a quick and dirty experiment – two mason jars, 1 sous vide circulator, 1 quart water per jar and ~0.8lbs of domestic 2-row and oats split 50/50. This would put us close to the traditional 1.25 quarts/lb mash ratio many homebrewers use.
Process
Seems so ridiculously tiny, but there you are one pound of Great Western 2-Row
Grind The Barley.
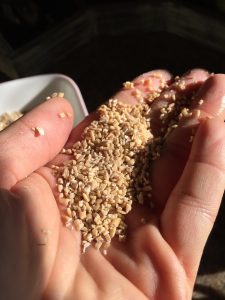
I ground a pound of barley through my lovely MM3 mill to produce a nice even crush.
Crush Your Barley!
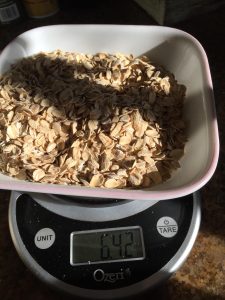
Weigh In:
I weighed out 6.4 oz of two row and oats for each jar. This 50/50 ratio is well above what all but the most fool hardy brewers would use, but what the heck. Let’s push this
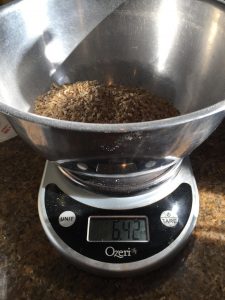
Weighing in at 6.4oz – The Main Show – US 2-Row
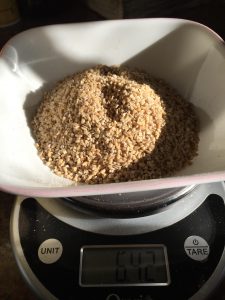
And in this corner – 6.4 oz of Steel Cut Oats
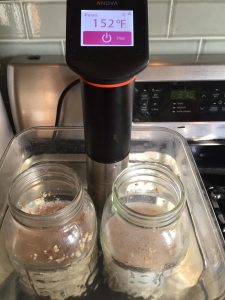
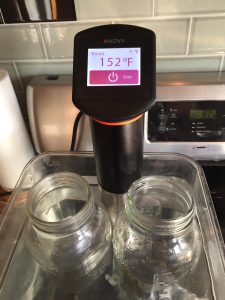
Pre-Heating Jars
When the dumb idea occurred to me, I grabbed my half gallon mason jars, added one quart of water and threw them into a Cambro with my Anova circulator (newer model in link, my old one is discontinued). I set the circulator to 152F and walked away for an hour to let the jars and water heat through.
The Soak
With the water at temp, I mixed the grist into the water and let it soak in the warm bath. Now this is arguably the tactical error I made with the setup. The grains dropped the temps into the high 130’s. To compensate, I let the jars run for 2 hours in the water bath. The first hour was all a slow ramp to 152F and the last hour was the “mash rest” for conversion. Turns out this is about as ideal a scenario as you could get for hydrating the steel cut oats. (Next time, I’ll heat the strike water separately and then dose into the pre-heated jars.)
Time and Temperature Doing It’s Thing

Play with the Hugo While Waiting for the Sciencing to Resume
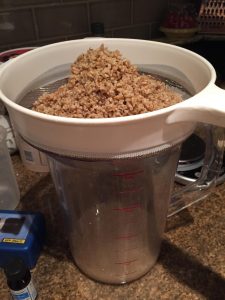
The Lauter
Take one fine mesh strainer, one giant Rubbermaid pitcher and strain. Each set of grain was allowed to drain. I let the wort drain for about 10 minutes after which we’d collected at least a pint of wort. (In theory we should have collected about 1.2 pints per sample, but I wasn’t being finicky here.)
High Tech!
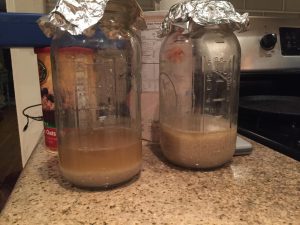
The Settle
I decided it was best to let some of the massive protein charge in these worts settle first before taking a sample. Oats sure do throw some gunk don’t they. Interestingly that even after an hour, the flaked oats were still messy as all get out. For the record, yes, the fine mesh strainer is a coarser separation mechanism than our usual gear.
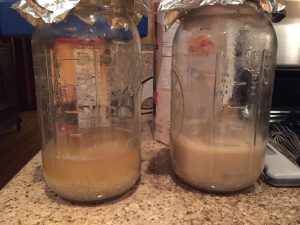
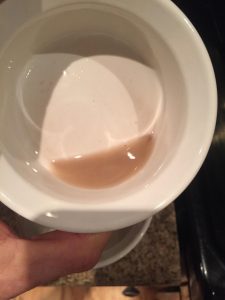
After lautering both. The Steel Cut on the left has a 10 minute head start, but it’s clarity was always leaps and bounds. See next pic
One Hour Later – Steel Cut on Left is still much, much clearer
The Tests
I decided to subject the samples to four tests.
- Mash Taste Test: How did the mash taste? Sweet? Dry?
- Iodine Starch Conversion: Was there free floating starch in the wort. (The iodine test isn’t exact, but it’s a good rough measure)
- Original Gravity: How much sugar did we get?
- Wort Taste Test: How did the wort taste?
The Results:
Steel Cut Oats:
- Mash Taste: Oats themselves are soft, but still with a bit of tooth. Some noticeable sweetness left in the mash. Remove the barley husk from this and I could totally see this being a Scotsman’s breakfast. (I would seriously eat it)
- Iodine: The test showed complete conversion and with the wort being clearer, there was no confusion to the readings – iodine went in iodine colored and stayed iodine color
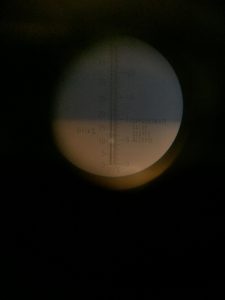
- OG: ~15.2B (aka 15.2P), compared to the theoretical max of 27.5P means we gathered to the wort ~55.3% of the sugar. This is less than the Flaked (see next section) Makes me a little worried about the overall extract.
- Wort: Wort tastes very oaty with a hearty mouthfeel and clean nutty component. Definite impact from the oats on the overall character. Would definitely enjoy this in the morning. Might be the ultimate Hot Scotchy.
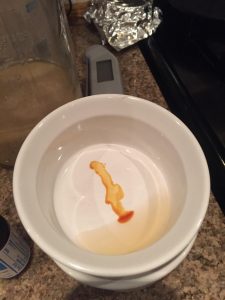
Contact! Iodine Stays Iodiney (Even after swirling and mixing)
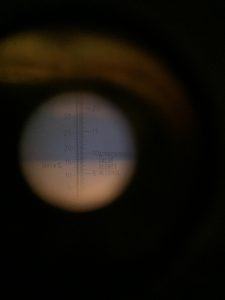
Some days my refractometer photo game is on point. This was not one of those days Steel Cut – reading about 15.2B
Flaked Oats:
- Mash Taste: This mash was total mush. The oats had no residual presence having just dissolved away. The mash itself was mostly bland, lacking sweetness, indicating it had moved into the wort.
- Iodine: The test showed complete conversion, though the extra material carried into the wort was causing some color change that eventually settled back to dirty iodine color
- OG: ~18B (aka 18P), compared to the theoretical max of 27.5P means we gathered to the wort ~65.5% of the sugar. Not too shabby.
- Wort: Much, much sweeter than the steel cut. The body is much thicker, more viscous. Feels like an old English nursemaid’s recovery drink “Beechum’s Barley Oat Tonic Revitalizes Your Sapped Spirits. Now With Radium for Extra Pep!”
Muddier, but still iodine color (the blotch of purple in the upper corner did fade back)
That’s no horizon, but it’s a lot higher than the steel cut!
Conclusions (aka Finally you get to the point you rambling so and so.)
Ok, so it’s fairly clear that we get extract when using steel cut oats raw in a mash. Even in this dirty test we see the grain softened and starches released. Now, this was also the best case scenario – the oats had a nice long (120 minute) mash, but a good portion of that was the ramp up to saccharification, so the soak would have been slower.
Does this mean I feel comfortable saying “eh, just go and throw your steel cut oats in the mash”? I’m going to say “maybe”. I think there was a fair amount of extract left in the steel cut compared to the flaked. This leads me to say that if you want a better guarantee of full extract from your steel cut oats, you should probably still cook them first just to give everything a head start.
The steel cut wort was clearer, but I’m not certain that’s going to matter with a proper mash with proper lautering, boiling, chilling and then a whole cycle of fermentation and racking. Besides isn’t oat haze part of all the rage these days?
What was also nice to see was just how much impact the oats had on the worts. If you’ve ever doubted oats were doing anything at the usual brewer’s addition rate of 5-10%, 50% will definitely convince you that there’s an impact.
What do you think? Any ideas for other “quick and dirty” science things we can perform? I did this in a single afternoon because it bugged me I didn’t know the answer.