A Better Way to Pumpkin – Part One The Preparation

It’s late in the year for us brewers but it’s still that season when one thing comes to rule all the beer making forums (and coffee shops and well, everywhere it seems.) – pumpkin pie. Seriously, I was in my local Target the other day and this was a sign that greeted me.

Just your everyday basic flavor of M&M I

‘m just going to assume (possibly fervently hope) this means we’ve reached peak Pumpkin Spice. Seriously, I love Pumpkin Pie. (And vastly prefer the Black Southern replacement of Sweet Potato Pie). A few years back I wrote an article for Beer & Brewer Magazine in Australia about Pumpkin Beer – the first step was explaining what the hell pumpkin pie is all about. If you’ve not stepped outside of the American world bubble, you may not be aware, but to the rest of the world, pumpkin pie is fucking weird. “What do you mean it’s a sweet pie made of squash?” (Ok, I lied, the first thing to explain is pumpkin is a squash, but a particular variety of). The thought of making a squishy dessert out of a vegetable is a strange concept, but most of us know the truth – pie, even vegetable pie, is g-d delicious. That’s because we know the dirty secret of pumpkin pie – the pumpkin itself doesn’t really have a lot of flavor. Really in the pie, most of what our veg is giving us is the custardy texture. The flavor we think of is comprised of brown sugar, cinnamon, clove, nutmeg, mace, allspice and ginger. Warm spices and caramelly sugar that combine in your mouth to make you happy. This is what everyone pictures when they think “Pumpkin Pie”. (That’s why all the internet outrage about “Pumpkin Spice Lattes” not having any pumpkin is particularly silly and misses the point that the real outrage is how awful a Pumpkin Spice Latte tastes) And so a vast majority of the pumpkin beers out there are really pumpkin spice beers with either little or no pumpkin flesh involved. It’s easy to see why – pumpkin mostly taste of water and “green”. Remember last year’s post Coffee and Jalapenos? Same stuff involved here. I can honestly say that one of the characters I detect in pumpkin infused beers is that roasted green jalapeno flavor/aroma of the methoxyprazines. Why no flavor? I’m convinced the big problem lies in the water content. It dilutes what little flavor there is in the pumpkin. My usual method of pumpkination is to go grab a couple of heirloom pie pumpkins, slice them up, chuck em in an oven until they get caramelly and burnt and all smooshable. Pull those out, scoop out the flesh, toss in the mash and let it rip. Please note, don’t try this with your garden variety everyday Jack-O-Lantern pumpkins – those things have less flavor than foam shipping peanuts. Now, I can walk next door to my local grocery store and pick those up – side effect of living in California, but what about if I didn’t? What if all I had was the big heavy cans of nuclear colored goo?

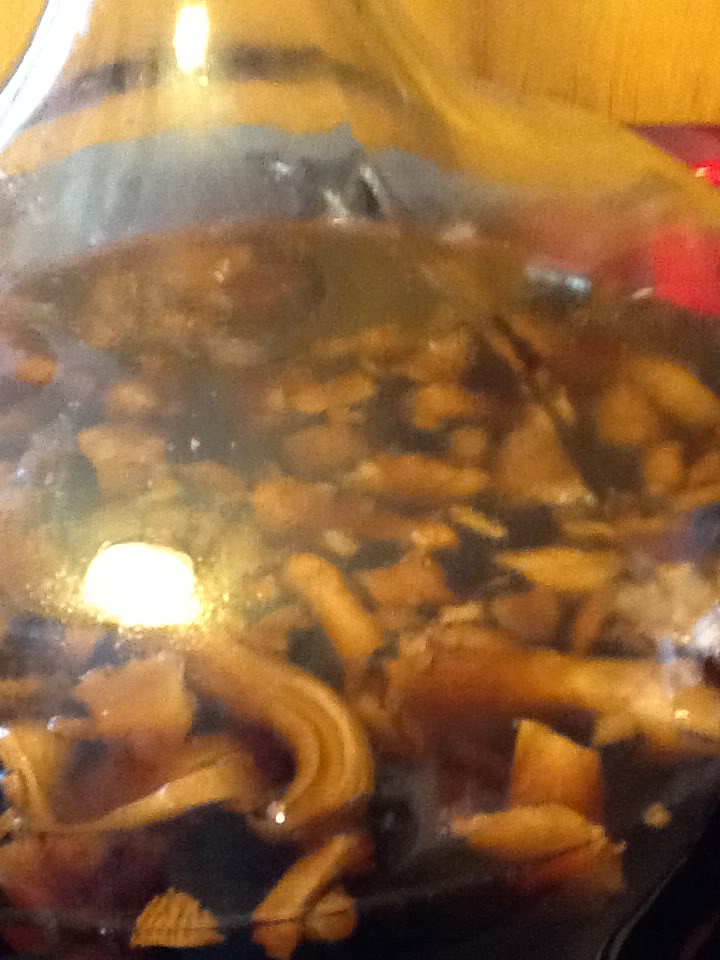
The basic starting tools Before I brew with it, I’m going to remove as much water and concentrate as many flavors as I can. Here’s the basic setup – for 24 hours, I strained a single can of pumpkin puree through coffee filters and a fine mesh sieve. Every once in a while, I weighed the amount of water coming out of the gloop. Here’s some numbers

Our starting pumpkin weight (the bowl has already been tared out)

Immediate Seepage into the draining rig Pumpkin Weight from Draining

Time Pumpkin Weight (grams) %age Original Weight Notes
0 hour 867 grams (30.6 oz/1.9lbs) 100%
10 hours 707 grams 81.5%
24 hours 637 grams 73.4%

Effect of draining

Time Water in the Bowl (grams) %age Original Weight Notes
1 hour 121 grams 14%
2 hours 129 grams 14.9% Slowed down!
10 hours 132 grams 15.2% Not much change – swap out the coffee filters
13 hours 178 grams 20.5% Changing filters makes a difference!
24 hours 185 grams 21.3% Enough of that – let’s roast!

Where’d the extra weight go? I can only assume some of it evaporative loss, some to the coffee filters, some to the very strange fae who watch over my kitchen. After 24 hours, spread the stuff onto a sheet tray lined with a silicone mat (parchment paper will sub fine, but be more of a pain in the ass to work on), roast at 300F for 100 minutes. I pulled the pan every 20 minutes, gave everything a stir and mushed it out again. After 100 minutes, I think we can all agree – big difference. I’m going to prep a second round that is still drained, but I’m going to add sugar and spices to the glorp before roasting.

A 300F oven, a cookie sheet and a silicone mat

Why? Well, I think we can agree the draining didn’t pull moisture as efficiently as the roasting, but I think the puree as it comes out of the oven doesn’t have as much caramelly goodness as I’d like. I could roast at a higher heat, but I think that will just make the puree “browner” without any real flavor development. Stay tuned for that development and the brewing! Pumpkin Weight from Roasting

Time Pumpkin Weight (grams) %age Original Weight Notes
0 minutes 637 grams 73.4%
100 minutes 243 grams 28.0% Brickish Brown almost spackle like in texture

More Pictures

10 hours later – total weight 1473 grams minus the bowl weight (766 grams) – total pumpkin weight = 707 grams

After 13 hours, Harry Potter could have a drink

After 24 hours, we’re down to 637 grams of solid mass for about 26.5% loss of water

A 300F oven, a cookie sheet and a silicone mat

Spreading out the pumpkin mass

After 20 minutes before stirring and returning to the oven

Don’t Age Your Beer (too much)


I’ve now reached the age where I have to assume that there are number of people who no longer share (or were at least exposed to) common cultural touchpoints for my generation. So here you go – I still to this day sing this song when I’m making a salad. It’s usually in my head because the world doesn’t need the torture that is me singing. Don’t laugh – whatever childhood cultural flotsam has lodged itself into your cranium is just as silly. Anyway – the point of this post is to say – dont’ age your beer!* How’s that for a statement guaranteed to rile a few folks? That’s almost as good as my admonitions against decoction mashing for getting brewers’ dander up! In a few articles, I’ll be (and maybe Denny too) exploring a primary sin that many homebrewers are guilty of – taking too damn long to make the beer.

To start with, here’s a re-working of my “Expressway Brewing” article from Zymurgy a few years back that’s all about how to turn a beer around in 6-10 days! Express Brewing – Speed Brewing from Grain to Glass in Less Than 10 Days *:

Obvious counterexamples exist – for instance, Barleywines, strong ales, brett beers, etc. Things that have age as part of their inherent makeup – go forth and age them – Your IPA? Stop it!

Denny’s Comment: 

“Yep, look through all the “old standard” homebrew books and you’ll see lots of info about aging your beer. When I started brewing, back when books were carved in stone, the commonly heard refrain was that all beer benefits from aging. So that’s what we did. Sometimes it made the beer great and other times it resulted in a oxidized beer that had lost all of its flavor. Over time, experience taught us that there are more beers that don’t need much (if any age) than those that do. Don’t be afraid to taste your beers young! These days I’m making a lot of 2.5 gal. batches in the Zymatic. With a good pitch of healthy yeast and a temperature controlled chest freezer, I’m drinking a 1.064 IPA in less than days from when it was brewed and I don’t feel like there’s any sacrifice in quality.

There is one exception, though…your own tastes, which are completely subjective. Some people prefer an IPA that has had time to lose a but of its character and say it helps the flavors blend. I don’t agree, but you get to drink your beer how you like it and I get to do the same with mine. Just PLEASE, try it both ways and make an objective decision!”

The Next Shroomy

You may be aware that one of my favorite beers is a chanterelle mushroom infused wee heavy that I call “Wee Shroomy” (recipe in Experimental Homebrewing”). I’m extremely luck y to line in the Pacific Northwest for a number of reasons, but one of the biggies is the surfeit of wild mushrooms we have here. During mushroom season, I can walk out of my back door and usually find the several pounds of mushrooms I need to make a batch of it.

Special Mushrooms for Beer

Well, I also have some great neighbors who are mushroom hunters, too. Last Sunday, my neighbor Gary dropped off a bag with 3 1/2 lb. of matsutake mushrooms in it! I don’t even want to think about how much those would cost if I had to buy them! After some thinking and consultation with Drew, I’ve decided to brew a Belgian Golden Strong Ale with them. I’ll be sticking to the classic Duvel recipe of pils malt and sugar and using WY1388 fermented at about 58 in order to keep esters and phenols to a minimum. I want a bit of those, but I want to be sure to not cover up the delicate spiciness of the shrooms. I’ll do my usual processing of the shrooms to get them ready for the beer, although they’re sturdy enough I’ll be able to do a bit more cleaning with them than I can with chanterelles. Then I’ll chop them, vacuum pack them and freeze them. (Notice I never mentioned sanitizing.) After the beer is fermented out, I’ll thaw them out and add both the shrooms and all the liquid in the bag to a secondary fermenter and rack the beer on to them. A week or two on the shrooms should do it. I’ll taste as it sits (tough, but it’s gotta be done 😉 ) to determine how long to let them sit. If I end up anywhere near the beer I have in mind, it’ll be incredible! FOLLOW UP: First steps in the Golden Shroomy….a Belgian Golden Strong ale with matsutake mushrooms! A neighbor brought by 3+ lb. of matsus he’d found. I chopped them up and vacuum sealed them. They’ll go into the freezer for a few weeks until the beer gets brewed and is ready to have them added. When I thaw them put I’ll add both the shrooms and all the liquid they’ve exuded. I can almost taste it now!

Scrapple Beer

One of the biggest attention getters in the book is that we feature a couple of “Meat” based beer recipes, like Jeremiah Marsden’s “Pork Soda” or Charlie Essers’ “Bacon Helles” or our own spin on Digby’s Cock Ale. The recipes certainly grab your attention and make you cock your head in such a way as to go “huh?” (There’s a real reason too.. read to the end of the article) Why the meat talk? Because thanks to our kooky friends at Dogfish Head – meat beer is back in the news – since apparently they are producing a Scrapple Beer for their Beer for Breakfast.

Scrapple. is a quintessential Pennsylvania Dutch breakfast speciality largely associated with PA and Delaware. Delaware is home to Rapa – the largest producer of Scrapple in the world and Dogfish Head. So naturally, the two should meet up!

To make scrapple, you basically take everything left over from a pig – head, heart, liver, bones, ribs, etc and boil for 3-4 hours until everything falls apart. You remove the bones and fat. Reserve and grind the meat and then boil cornmeal in the remaining broth to make some sort of terrifying polenta/grit mush. You mix in the meat, a whole bunch of savory spices (sage, pepper, etc) and then cook for a while longer until it’s super thick. You then put the scrapple into pans and allow to cool and solidify overnight. In the morning, you slice and fry the scrapple and serve with eggs, maple syrup and whatever else you desire. It sounds terrifying, but it’s fairly tasty. Ok, back to the beer – DFH’s plan – Make a breakfast stout with Maple Syrup (from the grounds of the high school where Sam met his wife), Applewood smoked barley, lactose, cold pressed coffee and 25 lbs of lean scrapple from Rapa. Since this is a brewpub only special I think it’s safe to say – it’s a small batch – 5-15 barrels so approximately 0.8-2.6 oz of scrapple per gallon of wort. (Anyone know the size of the DFH brewpub system?) What do we have then? A smoky milk stout with spices and coffee. Subtract the meat from the equation and I think we can see that the beer itself isn’t that unusual. How would I go about making this? We’ll start with one of my favorite stouts – Mac’s Gone Oat Malt Stout – an attempt to replicate some of the magic of the old Maclay’s Oat Malt Stout. It uses malted oats which you’ll find from Thomas Fawcett. To get our smoke, we’ll use a little cherrywood smoked malt (from Briess) or if you have the gumption – smoke up your own. (March/April 2010 Zymurgy – “Smoke ‘Em If You Got ‘Em”) (AHA Members Only). Lactose, to give the milk. Cooked cornmeal, because that’s what’s in Scrapple along with pork. And then spices – pepper, sage and bay are the common flavors. Since they’re boiled in scrapple, we’ll boil them here. The coffee is cold steeped and added at packaging. Also for the maple flavor – since maple syrup goes bye-bye – I’d use a good extract like Olive Nation’s Maple Extract – just a touch! Voila – tasty Scrapple inspired beer – minus the actual pork.

Mac’s Scrapple-esque Breakfast Stout

For 5.5 Gallons at 1.057OG, 43 SRM, 28 IBUs, 5.1% ABV Malt/Grain/Sugar

7.00 lbs Maris Otter or Golden Promise
1.00 lbs Cherrywood Smoked Malt (or home smoked)
1.00 lbs Oat Malt
1.00 lbs Crystal 150L
0.75 lbs Roasted Barley
0.25 lbs Black Patent Malt
1.00 lbs Cornmeal (boiled into a loose mush before mashing – aka make polenta minus the stock and butter – boil for 20 minutes to gelatinize the starches for conversion in the mash!)
1.00 lbs Lactose

Mash Single infusion mash – 153F for 60 minutes Hops (Pellets)

0.5 oz Target 60 minutes
1.0 oz Fuggle 20 minutes

Extras

1 Bay Leaf Boiled for 5 minutes
1/4 cup Fresh Sage Leaves, bruised Boiled for 5 minutes
1/2 tsp Coarsely Cracked Black peppercorns Boiled for 5 minutes
2 cups Cold Pressed Coffee Concentrate (use a darker roast – instructions here)
1/2 oz Maple Extract Added at kegging/bottling

Yeast Wyeast 1318 London III (or your preferred) – ferment in the lower 60’s to encourage the spices


I promised to give some solid explanation on the whole meat thing, so let’s put meat and fermentation into historical context – in the bad ole days of people not really understanding what the hell was happening in their beer/cider/mead/wine – “fermentaters” figured out that if your product wasn’t fermenting vigorously or clearing that hanging some meat in the brew would perk it up and make a raucous fermentation that cleared beautifully. (Seriously, a side of pork wasn’t unheard of in a vessel of cider. Digby’s Cock Ale was a real thing and not just a bar bet gone wrong, etc). Back then they probably felt that the meat was giving part of it’s vital life force to the brew and that’s not entirely incorrect – as we know nowadays – yeast need nutrients and a piece of meat is going to provide those in abundance. This allows the critters to perk up and get down to business.


New Zealand Brewers – Liquid Nitrogen Luplin Extract IPA

I like goofy weird things – I’m not afraid to admit I’m also not afraid to tell you that I love novel uses of things like liquid nitrogen. I’m just jealous I didn’t think of this first! The brewers at Garage Project in New Zealand decided to play with using liquid nitrogen to separate “pure” lupulin from a bunch of Nelson Sauvin hops and then use that to produce their Hop # IPA. It’s fairly novel and looks fairly straightforward. To explain the process, they crafted a loving tribute to Breaking Bad. So what do we see here? WARNING – Liquid Nitrogen is hazardously cold (-196C/-321F). Don’t be a knucklehead

  1. Weigh out your desired whole leaf hops
  2. Mix with liquid nitrogen in a safe container.
  3. Muddle the hops to thoroughly mix and lightly crush the hops
  4. Strain the hops from the LN.
  5. Pulverize the hops with a food processor into hop dust
  6. Pass the dust through a sieve to remove the less friable plant matter
  7. Add the resulting lupulin dust to the boil

To what effect? In their BeerAdvocate posting, they say they’ve used the process through the boil and yielded a smoother bitterness and delicate aroma. (Hey, aren’t those the same words used by First Wort Hop advocates?) I would suspect that part of the smoothness and bitterness effect is what they attribute it to – removal of plant matter. I would also suspect that it’s because you’re not getting the oils and beta acids. The method they’ve struck upon is much simpler than the typical supercritical CO2 process that is used to create hop extract like people find in Northern Brewer’s “Hop Shots” or straight in the can from Yakima Valley Hops. For that you expose the plant matter to extremely high levels of CO2 pressure (1500-4000 p.s.i.!) and receive out the other side a thick goopy oily extract. It’s potent as hell, but check out this video for why I still haven’t tackled my own extractions at home. It’s sorta terrifying to have that much pressure laying around in a homemade contraption. What do you think? Would you be willing to play around with “pure lupulin”? Lord knows I’ll be getting some liquid nitrogen, because why the hell not? Edited to add – Long time Falcon and now Portlander, Russ Dragon commented on Facebook that Breakside Brewery in Portland used a very similar technique with their fresh hop beer. Doing a quick search yields this article in “The New School”. And another one here from firstwefeast.com Bonus points – there’s even a video

Breakside Fresh Hop 2014 from Ritch Marvin on Vimeo.

Looking at Breakside’s process, they’re using liquid nitrogen as a shattering agent to break open lupulin and not separating it from the green matter. Should yield a very different result, but it’s still no less interesting.

Mad Melomel

Pontische rododendron struik (Rhododendron ponticum).jpg
Pontische rododendron struik (Rhododendron ponticum)“. Licensed under CC BY-SA 3.0 via Wikimedia Commons. I never knew this was a thing – deli bal aka Mad Honey. Apparently, a special variety of honey produced from very specific varieties of rhododendron in Turkey. It has psychotropic properties from a neurotoxin (grayanotoxin) produced by the particular blooms. It is only recommended in very tiny doses. (e.g. a teaspoon swirled in tea).

Apparently, it also costs ~$166 / lb on the interwebz which means that my standard sweet mead recipe, which calls for 18 pounds per 5 gallons would cost… 8 carry the 4 add that into…: $2,988 So monthly house payment or a batch of mead likely to kill me dead like a Roman soldier or Greek Soldier (read the linked articles)?

Hmm… But thinking a little further… if a teaspoon is generally considered safe, how much would that be in a glass of mead? Consider the standard 6 oz glass of wine/mead. In our lovely English measurements, 1 oz is 6 teaspoons in volume, so 1 oz (volume) in 36 oz would be the equivalent dose. Doing some more math.. 1 gallon equals 128 ounce (768 teaspoons) or a little over 21 glasses of wine per gallon. So, 21 teaspoons of honey per gallon or 105 teaspoons for a 5 gallon batch (aka 17.5 oz by volume).

Given that honey weighs about 1.5 ozs per 1.0 oz volume, you’re talking 5.25 oz (weight) per gallon or 26.25 oz (weight) per 5 gallons (aka 1.64 lbs of honey). (fyi.. someone check my math.. I hate our screw ball system of volume/weight) Our theoretically safe batch of “Mad Honey Melomel” then would costs us… $166 * 1.64 = $272.44 for the “Mad Honey” portion plus whatever price you can get for 16.36 lbs of “Sane Honey”.

I don’t know about you, but holy poop – that’s a lot more money than I’d ever want to spend on a mead that could cause some serious issues. We here at ExperimentalBrew.com encourage the safe experimentation of new ingredients, but can’t fathom using this stuff without better, more reliable, more standarized understanding of the impact. (In other words… don’t do it!)

Question for you dear reader – would you try this honey? The Strange History of ‘Mad Honey’ (Modern Farmer) Marching into History with Black Sea Crazy Honey (Inspired Beeing)

Champagne Splits

The first article I ever wrote for Zymurgy was “Et Tu, Brut: Brewing the Champagne of Beers”. It was featured on the cover of the May/June 2006 issue (AHA Membership required to read). The whole article was about making Champagne style beers that were inspired by the appearance of beers like Mahleur Brut and Deus de Bosteels. Those are some great beers with prices to stop you in your tracks! Naturally, being homebrewers, Kent Fletcher and I figured that we should be able to do it ourselves! Here’s the basic write-up of the whole process – Methode Champenoise for Beer in the Brewing Techniques section of the Maltose Falcons website. I tend to think of it as very simple – you’re basically just storing the bottles and then cracking them open for 30 seconds!

Methode Champenoise 30 Second Summary

  1. Make the beer and ferment to dryness
  2. Bottle the beer in champagne bottles with a spicy sugar syrup (Champagne bottles with caps)
  3. Put the bottles in a case – cap side down and lay the box on it’s side. Wait a few weeks.
  4. After waiting, slowly tilt the box upright over a few weeks, give the bottles a twist everytime you move the box. The end state is bottles resting upside down on their caps in the box.
  5. Chill the bottles overnight in the fridge
  6. In the morning, mix acetone and dry ice in a metal pan. Narrow pans work best. Use a thermometer and watch the temperature drop to -20 to -40F
  7. Take a bottle and hold it, cap side down, for 30-60 seconds to freeze a plug of ice in the neck.
  8. Brace the bottle against your leg, point away from anything damagable and pop the cap
  9. When the ice and yeast plug fly – squirt in a little extra beer / liquor / spicy sugar solution and cork and cage. (We use the plastic hammer in corks)

So, now that the recap is done – what’s the deal with the brut today? Why talk about it now? Because on Monday, Fletch and I will be re-brewing the classic Brut du Faucon! But this time, we’re going to be going about it in my splitting ways so that we can produce multiple Bruts from a single 15 gallon batch. Here’s the base recipe:

Brut du Forty

For 16.5 gallons at 1.088, 21 IBUs, 5 SRM, 10% ABV (before bottling), 90 minute boil

Grain/Sugar

30 lbs Pilsner Malt

1 lbs Aromatic Malt

1 lbs Caramel Pils (8L)

4 lbs Sugar

Hops

1.25 oz Magnum 12%AA 60 minutes

Hops (5 gallon Final Chill)

1.00 oz Pacific Jade 9%AA 10 minute whirlpool stand

1.00 oz Citra 14.4%AA 10 minute whirlpool stand

Mash 148F for 60 minutes

Yeast

Wyeast 3787 and a few others TBD

And then the magic – not only will be doing multiple yeasts – but I feel like we’ll be pulling my classic trick of – Chill one part of the wort and stop! Toss in a bunch of hops and let them steep as a knockout addition. Then chill that part and boom – we have Brut Regular and Brut IPA! Updates later when we’re closer!

Coffee and Jalapenos

For a long time I’ve been a proponent of a very simple method of adding coffee to your beer.

My process is a long cold steep – 1 cup coarse ground coffee, 2-3 cups of filtered cold water. Mix in a French press, soak for 8 to 12 hours, press, filter and add to the beer in the keg/secondary.

I do this process a few times a week because it’s a way of making coffee that my un-caffeinated brain can handle. Press, pour over ice with a little water dilute, drink, repeat until brain screams for mercy. One pot of coffee concentrate can last for several days in the fridge.

As another advantage, using a long slow cold extraction process pulls a different set of flavors and aromas than the typical high speed, hot water extraction. Hot extracts grab acidic and acrid flavors from the coffee beans and blows out much of their aroma, the cold method avoids most of the a’s in favor of extracting the more volatile essential oils. The end result is more fragrant, richer and sweeter with a potent aromatic punch. But.. is there a dark side?

I first noticed it back in January of this year when I judged an attempt at a White Stout. (A style that made Denny say “man” about 100 times as I convinced him it belonged in the book) The color was pale golden, the beer was a little turbid, but it had a wonderfully rocky head. So far, so good!

Unfortunately, immediately on putting it to my nose – all I could smell was green pepper and jalapeño. A strong vegetal note sat on top of the beer. It hid most of the coffee and cacao nib flavors that the brewer worked to put in the beer. While I can’t say for certain that the brewer used cold steeped coffee, I believe they did. (see edit below!)

So how did they get such a flavor? I decided to do some experiments. I broke out my trusty grinder and a couple of different bean/roast types. Specifically, the experiment focused on lighter roast blends vs. darker roast blends. Think Kona vs. Columbian. (For the record, I tend to prefer a medium roast for my coffee to hit the flavors of light and dark roasts)

I prepared the same coffees the same way. 1 cup coarse grounds to 3 cups water. Sit for X hours at room temp, press and sample. I repeated the experiment with the same bean types sitting for 12, 24 and 36 hours.

When I sampled the resulting concentrates, I found the culprit. Each of the lighter roasts had a lighter aromatic profile that included some faint vegetal aromas. These green aromas were barely there when the grounds were soaked for 12 hours, but as soak time was extended, the flavor grew more dominant. The darker roasts on the other hand tended to become harsher, more acidic over time, but didn’t pick up any greenness.

The worst offender in the pepper derby was a bag of Safeway Select Kona Blend City Roast. Even smelled at 12 hour mark the aroma was Jalapeñoeriffic. Of course, in retrospect, this shouldn’t be a big surprise. In a light City roast, the beans aren’t nearly as heated through as the darker roasts, leaving behind more of the green compounds. During a hot extract process, those compounds are volatilized before you ever get to sip them. The darker beans get more throughly heated, losing a number of aromatics and other compounds (including caffeine).

Given the delicate nature of aromatic compounds, it’s reasonable to assume that they would burn up in the roaster. Doing some additional reading (google “coffee green pepper“) turns up a class of chemicals pyrazines. Basically it’s a set of compounds that are structured as rings, stabilized by Nitrogen.

In coffee and wine, Methoxypyrazines convey “green” flavors, particularly 3-isobutyl-2-methoxypyrazine, which smells exactly like green peppers and peas. Interestingly, at least some of the results seem to indicate that the roasting actually covers the aroma and not volatilize it. This is reinforced by another chart in the Clarke and Vitzthum book that shows the level pyrazines don’t change between raw and roasted coffee.

In corresponding experiments with an aroma model for the coffee brew the assessors did not notice the absence of 3-isobutyl-2-methoxypyrazine. This leads to the conclusion that roasting of raw coffee does not only produce the pleasant aroma, but, in addition, generates odorants which mask the ‘green peas’ note caused by methoxypyrazine. (Coffee: Recent Developments – Ronald Clarke, O. G. Vitzthum)

So here’s my recommendations for a cold steeped coffee addition: Test your beans first! I like a number of the flavors and the higher octane rating of a lighter roast, but for a beer addition, I might consider starting at a medium roast and moving up from there. Additionally, limit contact time or at least conduct the extract at a lower temp in your fridge.

Otherwise, I think cold extract is the way to go when wanting a little java jolt brew.

Edited to add: Heard back from the entrant who’s beer I judged and here’s what they did – 1oz of coarse ground coffee (Handsome Roasters’ Regalo de Popayan – a lighter roast coffee – note the “riesling” characters they reference? That’s the pyrazine!) in a growler for 48 hours. They submitted two different entries – one CO2 purged, one not. I only judged the un-purged entry which had the green pepper. The other ended up winning a 2nd place medal. Quoting from Ward who did some followup research (and he’s actually knowledgable in chemistry – unlike some of us here):

Looking at structures it doesn’t appear to be an oxidation related process, as the methoxypyrazines that are responsible for bell pepper flavors aren’t oxidation products of those that produce favorable aromas. Instead it looks like the result of different substitutions off of the pyrazine ring. So in short, your base pyrazine content might be a major deciding factor on tasty versus vegetal. Might explain why some of my coffee beers with super roasty coffees were delicious, and why the one I just made with delicious, mellow coffee was a bummer.

Another Reason Why Experimental Brewing Is Important

As Denny and I get deeper into this book, the stronger I feel the whole enterprise depends on your favorite definition of “experimental”. It means something different to lots of people. Do we mean experimental as a scientist means it? Carefully measured and designed explorations aiming to discovering an underlying objective truth? Do we mean it like an artist means it – the avant garde, the unexpected that in a brief exposure can expose a subjective truth and a deeper understanding of life? (Yes, we’re talking about beer, but jokes aside : beer is a thing that has been fundamental to human civilization becoming civilized. Look at how few words for beer exist across the glut of human languages – that’s linguistical inheritance for you)

The artsy side of things, the wildly weird and strange side of brewing is the sexy attractive stuff. We see it every time we pour a beer for friends. Which garners you more praise and looks of concern: “oh this is my pale ale” or “this is my Citra and mango infused Pale Ale aged on exotic hardwood”? That sort of thing is a lot of fun as I sit here and drink Stone Brewing’s “Farking Wheaton W00tStout“. It’s a gaudy 13% abv Imperial Stout with Rye, Wheat and Pecans blended with some aged in Bourbon Barrels. That’s just nucking futs and fun to roll around in.

But there’s the serious side, the science side. It’s less sexy, less flashy, but damned if it isn’t important. And here’s my point on why the science side is a critical piece of the book. I was born a full blown nerd. Ask my mom – when she wanted to get me to do something as a kid, my reward was a trip to the Science Center. I used to quiz people on what I learned. (Hey, wait I still do!) Some how my science side flourished even as I was raised in a family of literate types. (I kid my mom scrimped to be able to send me to science camps and university programs)

Naturally, for a kid of my bent, I wanted one of those 500 chemistry experiments in a box. Out of a fear that I’d blow the house up (who needs a chemistry set when you have a shed with lawnmower gas!), mom never did get me one of those kits. Of course, these days you can’t buy any chemistry sets or chemicals or anything else without ending up a suspect in a terrorist plot.

Instead of that magical box of fun, I was set loose in the kitchen. After some rudimentary training, I turned the culinary into experimental. The family suffered through quite a few iterations of things gone terribly terribly pear shaped. But it all was in the name of science. Now-a-days there’s the whole terrorist issue in play or maybe it’s a “cooking meth” sort of thing. Regardless, home science has taken a big hit over the years with people being shut out of a chance to make “magic”.

Brewing can serve as another outlet of science in the home. Mitch Steele of Stone Brewing (an odd coincidence I swear) lays out in his recent blog post – brewing is a process that requires planning and careful consideration. That same consideration and process is what’s needed when you think science – “what happens if” can only be determined if “everything else is the same”.

I’ve rambled, but it’s important that we keep a sense of scientific wonder alive and an understanding of it all. Otherwise, you can be as whack-a-doodle as you want to be, but it won’t teach you a thing. To that end Denny and I have got to remember that we’re trying to provide the reader a basis for experimenting both in the scientific and artistic sense.

Converting the Wicked – Pumpkin Time!

It’s pumpkin time and as sure as my name is Drew Beechum, the internet is awash in question about pumpkin beers. So to aid in answering some pumpkiny questions, I present to you a column all about the long hard slog to convert my sister to the ways of craft beer. This column first appeared in BeerAdvocate the Magazine in the fall of 2011. Since that time, my sister has gone on to brewing a ton of different beers and haunts the Tampa Bay craft beer scene better than I could. If you happen to see her say hi from her little brother. Her note about the recipe, the spices of the beer are too muted for her tastes. She’s also brewed a really nice Imperial version of the beer as well.


After more than a decade doing this brewing thing, there are a few questions that I see again and again. One of the trickiest is converting the masses to the gospel of good beer. Like missionaries of old who went solo into “uncivilized” areas, we march forth full of fire and brimstone railing against the tide of industrial backwash. But look, all those guys ever did was piss off the natives and possibly end up in a stew pot. By far, the best way to do pull off the conversion miracle is the slow and quiet way. Modern missionaries refer to this as conversion “by our presence”. I prefer to think of it as “not being a snobby know it all prick who makes people reach for the door instead of a pint.” Not nearly as catchy and sermon worthy, but who’s perfect? Anyone near the state of Florida is hearing laughter because, ladies and gentlemen, I offer as my proof of success, my older sister Aimee. (who will either consider this foolish or have me killed) The laugh isn’t because I succeeded, but instead at my notion of “subtle” and “quiet”. See now, my older sister discovered the fine art of drinking beer in college during the late 80’s. (Did I mention she’s older than me?) Since this was in Florida, a state finally catching on to the craft beer thing, she did not develop a taste for worthy brews. For years, this was my secret shame. I come from a family that doesn’t do real beer. My mom prefers a glass of champagne or a half of cider while my sister preferred her “Light”. I tried everything to convert them, including being an obnoxious twip of a young brother (a stunningly natural role for me). On one trip through San Francisco I dragged her from one beer joint to another until we arrived at the Toronado. She begged me for her “Light” beer. I didn’t dare ask the bartender out of fear. I gave up after that. I’d offer a taste now and again. Then one year the family spent Thanksgiving in Santa Rosa, CA. Surprisingly (not) our hotel was a very short walk from Russian River Brewing. Night after night, I washed away the day’s wine residue with Vinnie’s amazing beer. Before this trip my sister told me she’d upgraded to drinking a “Lite” beer and the occasional Guinness. Since RRBC offers no “Lite”, I pointed her to their blonde ale which garnered a “Meh” response. I then offered her a glass of their OVL Stout and that’s when it happened. She liked it! She really, really liked it! Now this wasn’t a thunderstruck moment of instantaneous change. The next day she was right back to her “Lite”, but the transformation had begun. It many, many years of back breaking obnoxiousness, but like water washing endlessly over a rock, I’d make a crack. Little did I know that someone else would complete the job! Fast forward some time and my sister re-meets an old college beau – a homebrewer, no less. Cupid, angels, hearts and curly little bows, etc . The next thing you know she’s texting me from Dunedin Brewery’s “Stogies & Stout” festival, raving about the beers. A barleywine here, a brown ale there, the trickle became a flood. For my birthday I received Cigar City brews! When they got married, Chris’s bachelor party consisted of running around to good beer places in lieu of the passĂ© stripper fest. It was there I discovered that his brew stand was incomplete – no pump. Nothing like buying a high temperature impeller pump as a wedding gift. It’s both useful and annoyed my sister! Now, the transformation is complete. A request recently came across the wire – help her design a pumpkin ale (another favorite) that she could brew. It only took 12 years! Now, what about my mom?

Wicked Sister Pumpkin Ale

For 5.5 gallons at 1.054, 23 IBUs Malt / Grain / Sugar / Fruit 7.0 lbs Domestic Two Row (or Maris Otter) 2.0 lbs Munich Malt 1.0 lbs Crystal 60L 2.0 lbs Pie Pumpkin Flesh, roasted and scooped (or 1 big can of 100% Pumpkin Mix) Mash for 60 minutes at 153-154F Hops 1.0 oz Tettnang (4.5%AA) for 60 minutes 0.5 oz Tettnang (4.5%AA) for 20 minutes Spices (add at 5 minute remaining or create a vodka tincture for packaging) 1/4 tsp Cinnamon 1/4 tsp Ground Ginger 1/8 tsp Nutmeg 1/8 tsp Clove (or allspice) Yeast Wyeast 1272 American Ale II

Repeating Yourself

Inspired by Janis Gross and her Facebook post today, I feel that its important to say a few words about repetition. So digging back through my archives, I want to present to you the unedited version of my BYOB column in BeerAdvocate Magazine. (You should subscribe – it’s a damn good magazine even if I’m writing for it!) This is from around July of 2010 – “Practice Makes Perfect”


On an episode of the Jamil Show, super award winning homebrewer and host Jamil declared that if you really want to be a great brewer and understand your system forwards, backwards and sideways then you should brew every day. I’m not willing to go that far, but I have noticed that time away from brewing always makes the next batch seem to go “wrong”. It’s the simple fact that Jonny Lieberman learned on his first brew day back: practice really does make perfect.

The magic point rests at about the 2-3 week mark. When I’m brewing frequently, everything moves like clockwork. The brew itself may not be excellent, but the brew day will. It’s a study in muscle memory and in Zen brewing. You can let go of the obvious. No more fretting and or “oh crap! I forgot to clean that!” With the mundane handled, focus is freed for the details.

Another effect of the increased practice is the timing. When I’m actively brewing, I’m busy during the session. No more of this “brewing is two hours of work crammed into eight hours” stuff for me. I’ve got my mojo working getting kegs cleaned, equipment tuned up and everything properly squared away. Yeast starters? Check! Oxygen? Check! Full rinse and sanitation of the chiller? Check! Event the mash tun gets cleaned immediately, dried and stacked with no rotting mash to do in the olfactory senses.

Conversely, despite the buzzing and flying around the brewery, brewing by muscle memory frees up the grey matter. Now that you’ve got the mental checklist whirring in the background, the foreground brain can engage in experimentation. Think of it as the incredibly useful equivalent of daydreaming. “Lalalala.. This is an IPA, what would happen if I added black malt or smoked malt?” Ok, don’t do the smoked malt, that’s just a bad combo. I didn’t say all your ideas would be good, just that there would be new ideas, listen to the things popping off your head and be prepared to shift on the fly. Since this is homebrewing, there’s no reason not to.

For the pros, on the other hand, there’s plenty of reason to be hesitant. Between the money leaving company coffers for ingredients, power, glycol and labor and the need to produce beer that customers consistently buy- the trepidation factor is certainly higher. But watch these guys in action and the muscle memory effect is in full force. To the untrained eye, there’s less obvious watching and thinking. They’re assiduous about taking notes, as should you, but the record keeping isn’t something thought about.

They only get away with it because of that intimate knowledge of their deck. There’s no guessing – they know if I add X gallons at Y temperature it will stabilize to this. If I add 500 ml to the HLT, it sufficiently acidifies the sparge water to prevent pH problems with the sparge.

Nowhere was this more evident to me then a recent trip to my friends at Eagle Rock Brewing. When they opened a few months back, it wasn’t atypical for a 10 barrel brew day to take 18 hours. Jeremy and Steve aren’t newbs , they’ve been homebrewing for quite a while. The new scale and the new gear (Alesmith’s old system) forced a muscle memory reboot. Now they’ve got it down to 12 hours and you can bet with a few more months and a few new bits of gear, it’ll go even quicker.

The moral of the story? Don’t let your brew gear lay dormant. If your partner gives you static, explain that you’re doing it to remain in fighting trim and ultimately brew faster to spend more time with them and better beer!

Time is Short!

Since time is always tight, how about something quick that will impress your friends, neighbors and fellow brewers? Mary Izett of Fuhmentaboudit on the Heritage Radio Network gave a talk at this year’s AHA Homebrewer’s Conference on “Alternative Fermentations”. The talk was filled with different projects you can tackle when you have a few spare cycles. To demonstrate, she poured a Strawberry Peppercorn “Short” Mead. I’ve always talked in the past about mead as a beverage with a super fast process (2 hours) and interminable wait (4-12 months) before you get a glass of something tasty. Here’s the coolest part about her short mead – when it was on draft, it was one week old! It was fresh, light, spritzy and unbelievably refreshing in the face of brutal East Coast humidity. The speed and rejuvenating characteristic of the mead come from its relatively small stature. Instead of a whomping 13%, this one clocks in at a modest 5-6.5% Even better, there’s no sourcing of esoteric ingredients, needed. Everything in Mary’s recipe, minus the yeast, is available at your neighborhood Trader Joes’ (or equivalent) and lasts forever on the shelf. Buy the ingredients ahead of time and make it on a sleepless night. Don’t feel tied to the idea of strawberries and pepper – do whatever strikes your fancy. How about lemon peel and thyme, candied ginger and blueberries, sumac and rose water? Many great possibilities to explore in only a week! Want less? Just scale the ingredients and go!(Check out mylifeoncraft.com for more of Mary’s experiments and the NY Beer Scene) Mary’s Strawberry Peppercorn Short Mead For 5.0 gallons at 1.036-1.042, ~5-6.5% ABV Ingredients 3-4 packages Trader Joe’s Freeze Dried Strawberries, pulverized 2 tbsp Crushed Peppercorns 1 dose Yeast Nutrient (according to package instructions) 6 lbs Trader Joe’s Mesquite Honey Filtered Water Dry Champagne/White Wine Yeast Instructions

  1. Steep the strawberries, peppercorns and yeast nutrient in a few cups of boiling water
  2. Add honey and 2 gallons of water to fermenter and shake/stir to dissolve honey.
  3. Add the steeping liquid (and solids) and top with cold water to 5 gallons. Shake/stir some more.
  4. Pitch and ferment in the 70’s until the ferment stops at 1.000.
  5. Chill to near freezing to crash for a day, then rack and force carbonate to a briskly sparkling level (3.0+ volumes) – Serve and enjoy!

Splitsville – The Main Story

Earlier this week we talked a bit about the value of smaller brewing to the homebrewer. Today, let’s talk a few different techniques to get more variety out of your brew day. Remember the idea is say you don’t want to brew 10-15 gallons of the same beer? (or 5 if you’re really addicted to lots of flavors) After all, different flavors are wonderful and sometimes you just gotta fill out those taps! These days this is how much of my brew day goes. Virtually every batch has a plan like this attached to it. Makes recording the recipes difficult! Here’s I go about it Mash Techniques

  • Parti-Gyle: Aka take first runnings and second runnings (maybe even third runnings if you’re crazy) and make some new beer!
  • Second Mashing: Run a second smaller mash and use that to affect a portion of your first mash runnings.

Boil

  • Split the boil: Multiple pots, multiple beers
  • Add Water: Brew high gravity, chill part of the high gravity beer, add water – instant smaller beer!
  • Add things in different whirlpool steps (say – chill one half your beer and then):
    • Add sugar, extract, additional runnings, Belgian Candi Syrup to the boil kettle and change the gravity
    • Add spices, hops

Fermentation

  • Split Yeasts: By far and away the easiest thing to do with such profound impacts
  • More sugar: again change your gravity! change your character! Adding something like maple syrup as the primary dies down will help preserve the flavor/aroma.
  • Fermenter differences: Ferment in carboys, buckets and kegs – the different fermenters will all yield different results
  • Dry Hops: change up your beer’s dry hops in the secondary or in the keg. I’ve had radically different beers from a simple switch of the hops added for dry hopping.
  • Fruit: The most obvious thing to do with a wheat beer – add fruit to one portion. I usually do this with a Wit beer or Saison for my SO.
  • Other flavor additions: Oak in one portion (or different types of oak soaked in different spirits), teas, herbal, booze, and regular, coffee. The list goes on and on.

Post Fermentation

  • Eis the Beer: Take a portion of the beer and freeze concentrate part of it. Two beers! One mash!
  • Add water to the package: Taking a cue from the big brewers and from Mike “Tasty” McDole, add de-oxygenated water to your beer to make a light weight session version.
  • Don’t forget to blend! Mixing together multiple beers can yield really interesting results. This is how Mike Mraz won the 2012 Mayfaire with his sour beer that was a crazy blend of multiple things!

So what have we missed, amigos?

Splitsville – The Beginning

For the first decade or so of my brewing career, I brewed nothing but 5 gallon batches. I went on the Brewing Network all the way back in 2007 to discuss my doofy way of brewing and to defend brewing 5 gallon batch making! Here’s why I defend the world of 5 gallon brewing and these days 1 gallon brewing:

  • More variety
  • Fewer equipment needs
  • More frequent brewing
  • More experimentation
  • Everything in homebrewing is geared around the 5 gallon batch
  • More Variety!

So when I moved into my first house a year or so later, I had enough room and a dedicated spot to my brewing. (Advantage to being a homebrewer before you get a home – your partner accepts the fact that brewing is part of the household activities and knows there needs to be space for it.) I went bigger! Namely, I started using 50L pots and grabbed a turkey burner, a pump, etc, etc. All the accouterments you’d expect a big boy brewer to have. When I received the moneys for my first book – The Everything Homebrewing Book, I immediately turned around and spent part of it on a 26 gallon kettle. I was brewing big time now! And I kinda hated it. It was nice to have the one big brew day and produce a lot of beer, but it kinda sucked that after a while, I just really didn’t want another keg of the same beer. I’ll admit, I’m a bit of a neo-phile. Now the real question – is what to do about it? (More on that on Friday!)

Sanitizing mushrooms – NOT!

I just got done writing up the recipe for my Wee Shroomy for the book. Basically a wee heavy with chanterelle mushrooms added to it. After trying various methods of dealing with the mushrooms, the one definite thing I’ve decided is that I hate the “soak them in vodka and then add the vodka” method. It adds an undesirable heat to the beer. I simply chop and freeze the mushrooms before adding them. Many people, though, seem to be deathly afraid of not soaking additions in vodka, to the point of not even trying anything else. I’ve always found that the alcohol content and low pH of the beer post fermentation were all that was needed for fruit (or mushroom!) additions. So, what do you do? Do you sanitize additions? If so, what’s your method? Do you think you could make the leap of faith to not sanitize?

True Confessions

A few years back in Zymurgy (March/April 2011, to be precise – go, go handy Zymurgy Index), I wrote about making your brewery organized and neat and welcoming of brewery activities. (Got a lot of “Man, my wife just saw this and I have to clean up the brewery now. Thanks!” emails for that one.) Well, it’s time for true confessions time – my brewery is a disaster area right now. You know how it goes. Stuff accumulates. Boxes that you’re holding onto in case you need to pack up a classroom, extra furniture as the interior design of the house changes, new toys that you buy for yourself. All of it needs a place to go and when your day is ugly or frantic, the garage ends up being the perfect place to toss stuff, until suddenly you can’t move around in there and it becomes a giant cluster headache nightmare.

So today, I’m fighting back, my weapons:

  • A call to the local charity pickup group – aka help me get rid of this crap!
  • A push broom
  • Mark’s Keg Washer to make short work of the keg pile.
  • Some new shelving
  • a few stout friends to move everything around for me!

Here’s why this needs to be done. It’s just no fun going into a cramped overrun space. It makes me far less likely to do anything in the brewery if it’s a giant freaking mess. Now, if you knew me 5-7+ years ago, you’d be shaking your head in wonder. Truth be told, I’m still comfortable with a fair amount of clutter. I’m a geeky fellow after all. I have my stuff and I like having it where I can reach it. (aka I’m not an organization nerd). For this new little gift, we’ll have to thank my partner in crime, Aymee. She’s kicked my butt until I’ve started doing it and good for me!

So what do you do to organize and make your brewery more effective and better to use?

Preconception and Perception

One of my biggest points in evaluating your experiments is knowing how to not fool yourself by letting what you think you know interfere with what you’re trying to find out. Listening to an old podcast of America’s Test Kitchen on my drive home last night, I learned about wine tastings conducted by Frederic Brochet. In a nutshell, in one tasting he served 2 glasses of the same white wine, only one was dyed red. Tasters proceeded to describe definite differences between the wines. In another, he took high and low priced bottles of wine, poured them ut, then refilled them both with the same mid proced wine. Again, tasters found definite differences. His conclusion was basically that it’s in your head, not the bottle. While that may be debatable, the point is that preconception guides perception. A concept I’ll write about (again and again) in the book. In the meantime, here’s a bit more about Brochet’s tests….

https://www.newyorker.com/tech/frontal-cortex/does-all-wine-taste-the-same

No Boil Experiment (Archived Forum Post)

(By User Dr. Reddog)

Inspired by my tasty berliner weisse experiences, in January I decided to try a no-boil experiment applied to one of my standard recipes. I scaled it down to one gallon, and altered it for the no-boil experience. This was a BIAB/No-chill/No-boil.

Anticipated issues to overcome, and how I resolved them
1) No-boil = DMS
Not necessarily. My understanding is that DMS is produced at 180 degrees, which explains why true no-boil berliner’s don’t have a DMS profile. As long as the mash and mashout stay below 180, it won’t be a problem.

2) No-boil = no sanitation
Again, not necessarily. Pasteurization occurs at 160 degrees in just a few seconds, so as long as the mashout is above 160, no problems.

3) No-boil = low hop utilization
This is the one true dilemma with no-boil, in my mind anyway. Hop isomerization is greatest at boiling temperatures, but does occur to some extent at sub-boiling temps. I decided to use a 15-minute Cascade recipe for this, since there aren’t bittering additions and it’s more-or-less hop bursted. I moved all hop additions to the mash, since this is the one and only step in the brew day. Since this was no-chill, the hoppy goodness is exposed to the hot wort for an extended period of time, which may also help with hop utilization.

Original Recipe (5-gal)
9# 2-row
1# crystal 60
3oz Cascade 15min
1oz Cascade 5min
Safale-05

No-Boil Recipe (1-gal)
2# 2-row (since there’s no volume loss with boiling, I bumped this up to maintain OG of 1.055)
0.2# crystal 60
0.5oz Cascade mash hop
Safeale-05

Process
BIAB mash (including grain and hops) 60 minutes at 152 degrees
Mashout at 170 degrees for 10 minutes
Transfer to 1 gallon container, sealed up
Yeast pitched the next morning at 60 degrees
Primary for 2 weeks at 60 degrees
Bottle and condition at 60 degrees for 3 weeks

Outcome
I seriously regret not taking pictures of this one, as it was surprisingly and unexpectedly clear; crystal clear. At least with the bottles I cold crashed for a day. I did open two bottles at room temperature, and these were slightly hazy. I was expecting it to be cloudy due to lack of hot break and cold break, and because I’m used to cloudy no-boil berliners. It was not sour like a berliner, but of course I didn’t add lacto.

Surprising factor #2 was how similar to the original recipe it was. The no-boil had ‘different’ bitterness (see below), but otherwise tasted the same. It did have a thicker mouthfeel, perhaps because proteins/etc aren’t lost to hot break? That’s the best explanation I can conjure.

Surprising factor #3 was how bitter it actually was. Not as bitter as the original recipe, but it definitely had a hop presence. The original recipe had 36 IBU’s. If I had to guess, I’d say the no-boil was in the low-to-mid twenties. In addition to the mash hops, you could also do a pseudo FWH addition by adding to the no-chill container, and you could always dry hop as well.

All in all, it turned out really good. However, there’s still more experimentation to be done, and for my 5+ gallon batches I’m still doing my standard boil process, but I may soon make the leap and try a no-boil full batch. After reading Dave’s post about his mash experiments I might try this again with a 40 minute mash. That would make for a really short brew day!

Addendum to the above... future experiments I’ll try to figure out the clarity issue, because in my mind it should have been cloudier. If/when I do a full batch I’ll probably do a wheat or rye, or something that I don’t mind being cloudy, just in case.

I’m thinking of running another experiment on this, but tweaked to increase hop efficiency. The idea is to pull out a small amount of wort halfway into the mash in order to boil the hops in a “hop decoction”. Since this is a hop-bursted recipe you wouldn’t need a long boil for the hops. Since it’s such a small volume hopefully the short boil would be enough to knock out any DMS that’s produced by bringing the volume above 180 deg. The side-boil would be occurring at the same time as the mash is completing, the whole process is still only one hour. You could in theory do an IPA by hop mashing, “hop decoction”, and dry hopping, but I’ll save that for later. Here’s my plan:

No-Boil Recipe (1-gal)
2# 2-row
0.2# crystal 60
0.3oz Cascade 15min
0.2oz Cascade 5 min

Process
BIAB mash 60 minutes at 152 degrees
30 minutes into mash, draw off 15-25% of wort, boil on the side for hop schedule
At 60 minutes mash (30 minutes boil), return boil volume to mash kettle for mashout
Transfer to 1 gallon container, sealed up
Pitch yeast the next morning

If it works well, I may try repeating it with Dave’s 40-minute mash, so 20-min into mash draw off and side boil for 20-min.

Thoughts? Criticisms? Anybody want to label me a heretic?